- Memberships
- Courses
- Private Courses
- Exams
-
Student Portal
- Student Portal Walkthrough Video
- Enabling The Student Portal
- How to add your Logo
- Assignments And Submissions
- Course Feed
- Documents
- Email Notifications
- Invoices and Certificate Access
- View Course as a Student
- Widgets
- Student Membership Card Printing
- Book a Course Page
- Timetable
- Account Switching
- Auto Delete Files
- Using a Display Name
- Using The Student Portal
- Enrollments
- Teachers
- Placement Tests
- Library
- Integrations
Level Headings in the Course Selector
You can control how levels display in the course selector by adjusting the visibility settings.
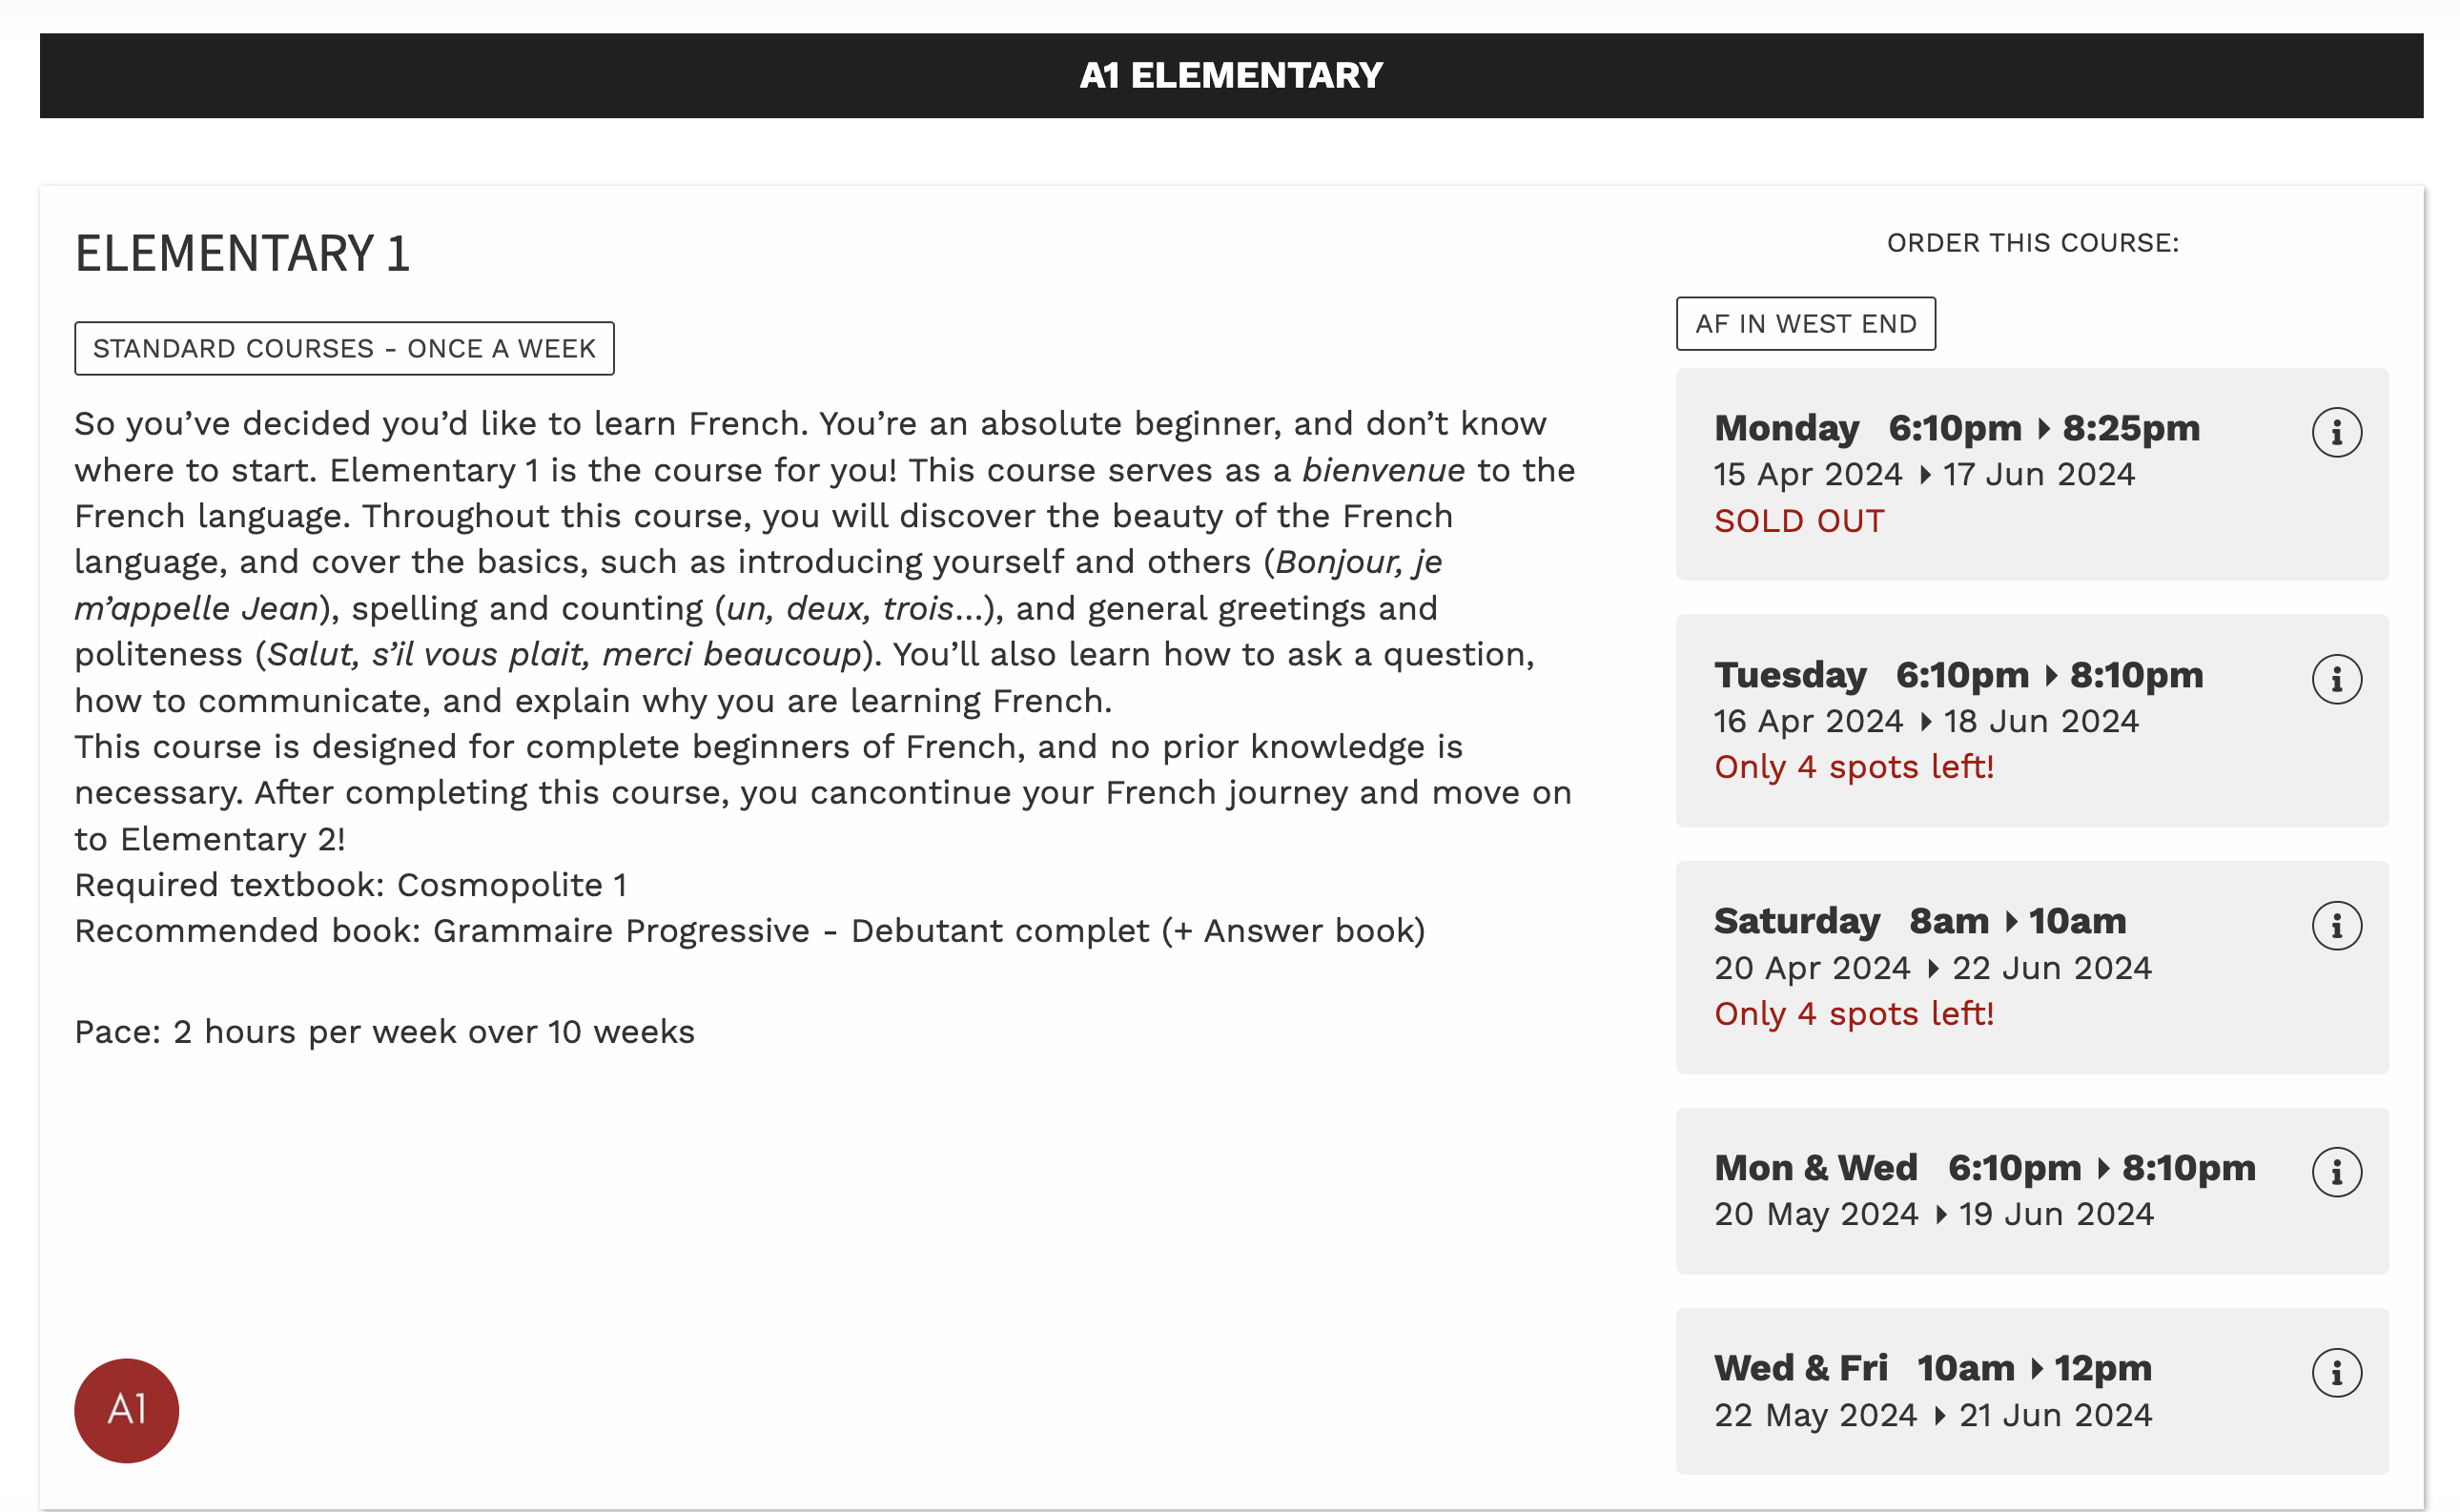
Headings in the course selector are the black banners that separate out the different levels displayed in the course selector, as seen
in the screenshot below:

How to display only the top levels as headings in the course selector
To have only the top levels display in the course selector as level headings use the below settings on the Levels within your configuration.
Go to Courses > Configuration > Levels
On the Parent/Top Level:

.png)
.png) On the sublevels have the 'Visible' box unticked.
On the sublevels have the 'Visible' box unticked.
This will allow the course selector to display all the sublevels under the top 'Parent Level' heading.
Note: If the sublevels are set to 'Visible' this is what defines it to be shown as its own individual heading and category of courses
in the course selector.
You can also set a sort order to control which order the sublevels display in if required.
